EV

EV vs Hybrid vs Gasoline: Which Vehicle is Best for You in 2025

The automotive world is evolving fast, offering more choices than ever. Electric vehicles (EVs), hybrid cars, and traditional gasoline models each bring unique strengths and considerations. Whether you prioritize cost, performance, or sustainability, making the right choice in 2025 requires understanding the differences. Let’s dive into a detailed comparison to help you decide.

Understanding the Basics: Electric, Hybrid, and Gasoline Cars

Electric Vehicles (EVs)

Electric vehicles run purely on electric power, stored in a rechargeable battery. They have no combustion engine. Popular EVs include the Tesla Model 3, Nissan Leaf, and Ford Mustang Mach-E.

EV

Hybrid Cars

A hybrid combines an internal combustion engine with an electric motor. It switches between or blends the two power sources for better efficiency. Well-known examples are the Toyota Prius and Honda Accord Hybrid.

Hybrid

Gasoline-Powered Vehicles

Gasoline cars rely entirely on a combustion engine, using petrol as fuel. They’ve been the backbone of transportation for over a century, covering a range from family sedans to powerful sports cars.

Gasoline

Cost Comparison: Which Is More Affordable?

Upfront Costs

  • Electric vehicles typically have a higher purchase price due to battery costs.
  • Hybrids are more affordable than EVs but costlier than gasoline models.
  • Gasoline cars usually offer the lowest upfront prices.

Long-Term Savings

  • EV owners enjoy lower running costs thanks to cheap electricity and minimal maintenance.
  • Hybrid drivers benefit from better fuel efficiency, lowering gas expenses.
  • Gasoline cars generally have higher lifetime fuel and maintenance costs.

Fuel and Energy Efficiency: Powering Your Drive

Electric Efficiency

Highly efficient, converting around 77% of energy from the grid to power at the wheels. They also have lower running costs compared to fuel-based cars.

Hybrid Efficiency

Use regenerative braking and battery power to reduce fuel consumption, making them ideal for city commutes with frequent stops.

Gasoline Efficiency

Gas-powered vehicles are less efficient and suffer from idle fuel waste, contributing to higher costs and emissions.

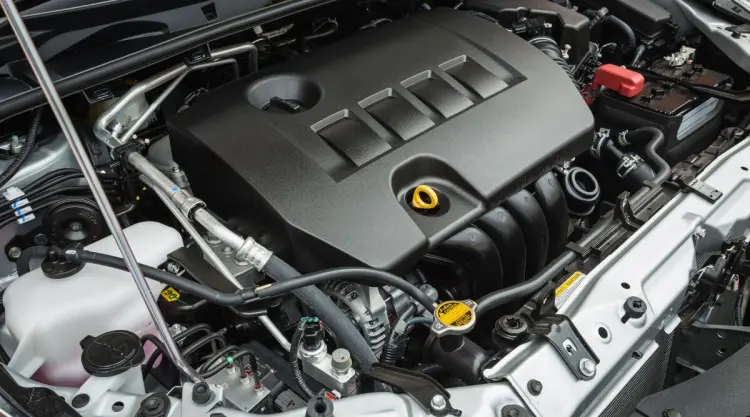
Maintenance and Longevity

EV Maintenance

Have fewer moving parts. No oil changes, no spark plug replacements, and no exhaust repairs. Battery longevity typically extends 8–10 years or more.

Hybrid Maintenance

These require maintenance for both engine and electric components but generally have lower costs than conventional cars. Regenerative braking also reduces brake wear.

Gasoline Maintenance

Traditional cars demand frequent oil changes, fuel system checks, and engine upkeep, making them more maintenance-heavy over time.

Environmental Impact

Electric Sustainability

These produce zero tailpipe emissions. When charged using renewable energy, they offer the cleanest transportation option available.

Hybrid Emissions

Hybrids emit less carbon dioxide than gasoline cars but still rely partially on fossil fuels.

Gasoline Pollution

Conventional vehicles contribute significantly to air pollution and global warming through high CO2 emissions.

Performance and Driving Experience

Driving an EV

Deliver instant torque and a silent, smooth ride. The absence of gear shifts enhances acceleration and responsiveness.

Hybrid Experience

These offer a comfortable and balanced ride, switching seamlessly between electric and gas power depending on speed and conditions.

Gasoline Driving Feel

Gasoline engines provide a traditional driving sensation, often preferred by enthusiasts for their familiar engine roar and robust acceleration.

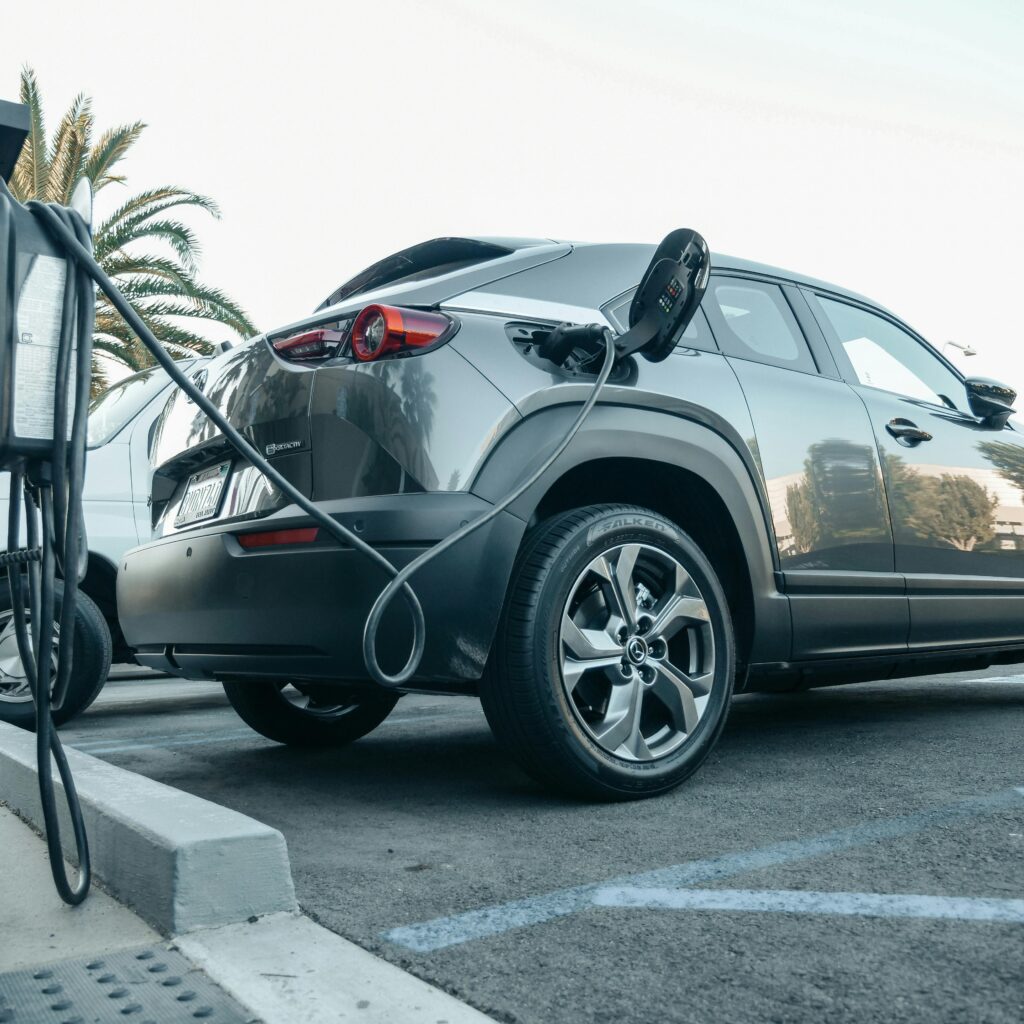
Charging and Refueling

Charging an Electric Car

Home charging offers convenience but can take several hours. Public fast-charging stations are expanding quickly for faster top-ups.

Hybrid Refueling

Most hybrids do not require plugging in. Refueling at a gas station is quick and easy, similar to a traditional car.

Refueling Gasoline Cars

Filling up a petrol vehicle is fast and widely accessible but comes with the cost of ongoing fossil fuel use.

Electric Vehicle Resale

While earlier EVs depreciated quickly, today’s models (especially Teslas) maintain strong resale value as demand surges.

Hybrid Car Resale

Enjoy stable resale performance due to their practicality and growing popularity.

Gasoline Vehicle Depreciation

Values are dropping faster as countries adopt stricter emissions policies and electric alternatives become mainstream.

Government Incentives and Regulations

  • Electric vehicles often qualify for significant tax credits, rebates, and reduced registration fees.
  • Hybrids may also receive partial incentives.
  • Gasoline cars face tightening regulations and increasing environmental fees in many regions.

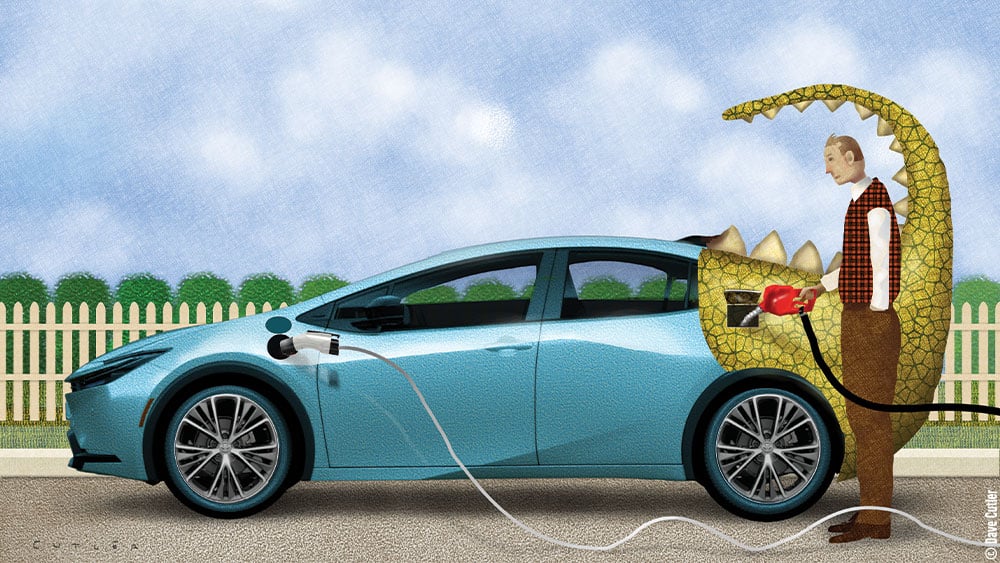
Future Outlook: What’s Next?

The Rise of Electric Vehicles

Automakers are rapidly investing in electrification. By 2040, EVs could dominate global car sales.

Hybrids as a Bridge

Hybrid cars will continue serving as a transitional option for buyers who aren’t ready for full electrification.

The Gradual Phase-Out of Gasoline

Petrol-powered vehicles will decline as stricter environmental laws and better alternatives take hold.

Which Vehicle Is Right for You?

Choose an EV if:

  • You want zero emissions and lower running costs.
  • You have reliable access to charging stations.
  • You mostly drive in urban areas.

Choose a Hybrid if:

  • You prefer improved fuel economy without full dependence on charging.
  • You drive a mix of city and highway routes.
  • You seek a balance between cost, efficiency, and convenience.

Choose a Gasoline Car if:

  • You need the lowest upfront cost.
  • You often travel in remote areas with limited charging infrastructure.
  • You enjoy traditional engine performance.

Final Thoughts

Choosing between an EV, hybrid, or gasoline vehicle in 2025 boils down to your driving habits, budget, environmental goals, and local infrastructure. Electric vehicles lead the way toward a cleaner future, hybrids offer a practical compromise, and gasoline cars remain relevant for now — but their time is limited.

Evaluate your needs carefully to invest wisely in your next ride!

For more info regarding the subject, visit EV vs. Hybrid vs. Gas: Which Vehicle Is Right for Your Needs

For more interesting info, visit 5 Tenacious Impacts of Electric Vehicles on Car Manufacturers – AutoUstaz

Mechanic performing regular oil changes on a car engine

5 Powerful Reasons Why Regular Oil Changes Are Essential for Your Car’s Health

Mechanic performing regular oil changes on a car engine

Table of Contents

  1. What Does an Oil Change Do for Your Car?
  2. Benefits of Regular Oil Changes for Vehicle Health
  3. How Often Should You Change Your Car Oil?
  4. Signs Your Car Needs an Oil Change
  5. Choosing the Right Oil for Your Vehicle
  6. Myths About Oil Changes You Should Stop Believing
  7. The Cost of Ignoring Oil Changes
  8. The Future of Car Maintenance
  9. Get Expert Oil Change Services Today
  10. Frequently Asked Questions (FAQ)
  11. Protect Your Engine—Book Your Oil Change Today!
  12. Conclusion

What Does an Oil Change Do for Your Car?

In this blog, we will delve into the advantages of performing a regular oil change for your car or truck. This simple act not only helps to extend the life of your engine, but it also has a significant impact on your vehicle’s overall performance. Additionally, we will dispel common misconceptions surrounding oil changes, provide tips on how to identify when it’s time for an oil change, and highlight how this routine maintenance can save you money and prevent costly mechanical issues. By regularly servicing your vehicle with an oil change, you can ensure that it runs smoothly and efficiently for years to come.

Note: Remember to check your vehicle’s owner manual for the recommended oil change interval.

Common Misconceptions about Oil Changes

There are many misconceptions surrounding oil changes, and it’s essential to address them to ensure proper maintenance of your vehicle. Some common myths include:

  • You only need an oil change once a year.
  • You can switch between conventional, synthetic, and semi-synthetic oils without any issues.
  • As long as you’re using high-quality oil, it doesn’t matter when you change it.

While these may seem like reasonable assumptions, they can actually harm your engine in the long run. Let’s dive deeper into why these statements are false and how they can negatively

Benefits of Regular Oil Changes for Vehicle Health

When it comes to vehicle care, few tasks are as essential and cost-effective as a regular oil change. This straightforward maintenance step plays a critical role in improving engine performance, extending the lifespan of your car, and preventing costly repairs down the line. By staying on top of your regular oil change schedule, you can ensure your engine stays well-lubricated, operates smoothly, and remains protected from wear and tear, making it a smart and impactful choice for long-term car maintenance.

1. Boosts Engine Performance

Clean and smooth-running car engine after oil change

Regular oil changes are also beneficial for the environment. By keeping your engine in good condition, it reduces harmful emissions that can contribute to air pollution and climate change. Furthermore, regular oil changes help reduce the amount of used motor oil that ends up in landfills or polluting our rivers and oceans

Engines that go too long without oil changes start to experience performance decline. You might notice hesitation during acceleration, knocking sounds, or a generally sluggish feel when driving.

2. Prevents Engine Wear & Overheating

Regular oil change services are essential for maintaining your engine’s performance and preventing it from overheating. Engine oil plays a critical role as a coolant by minimizing friction and dissipating the heat generated inside the engine. Over time, old oil collects debris and carbon buildup, reducing its ability to keep your engine cool and efficient. Skipping a regular oil change can increase the risk of overheating, especially during extended drives or in hot weather conditions. Prolonged overheating may lead to severe engine damage, costly repairs, or even engine replacement. By keeping up with regular oil change intervals, you ensure that your engine remains clean, cool, and in optimal working condition.

This can cause your car to overheat, especially during long drives or in hot climates. In extreme cases, overheating can warp engine components and lead to costly repairs or even engine replacement. Routine oil changes help your engine stay cool, clean, and functional.

3. Extends Engine Life

Regular oil change is essential for maintaining engine performance and longevity. Neglecting this crucial maintenance step can lead to significant issues, as old oil breaks down and forms sludge over time. This sludge can clog vital oil passages, depriving critical engine components of proper lubrication and causing premature wear. Prioritizing a regular oil change not only prevents sludge buildup but also ensures that your engine stays protected and runs smoothly for years to come.

Think of a regular oil change as your engine’s defense system. It flushes out harmful contaminants and maintains internal cleanliness. Vehicles that stick to an oil change schedule consistently outperform and outlive those that don’t.

4. Improves Fuel Efficiency

Many drivers don’t realize that a regular oil change directly affects their fuel economy. When your engine is properly lubricated, it doesn’t have to work as hard. That reduced effort leads to less fuel consumption.

If you’ve noticed a sudden drop in your car’s mileage or find yourself at the gas pump more often, it might be time for an oil change. Clean oil ensures maximum engine performance and fuel efficiency.

How Often Should You Change Your Car Oil?

This is one of the most common questions car owners ask. The answer varies depending on your vehicle’s make, model, age, and the type of oil you use.

As a general guideline, a regular oil change should be performed every 5,000 to 7,000 kilometers if you’re using synthetic oil. Some older models using conventional oil may still require changes every 3,000 kilometers. However, always check your vehicle’s owner manual for specific manufacturer recommendations.

For DIY tips, you can explore our detailed blog on how to perform a basic oil change at home to save time and money.

Signs Your Car Needs an Oil Change

You don’t always have to rely on a set schedule for oil changes. There are several signs that your vehicle might need an oil change earlier than expected. Look out for the following:

  • Engine noise: If your engine begins to sound louder than usual, it may be because the oil has broken down and is no longer lubricating the engine effectively.
  • Oil on the dipstick: If the oil on the dipstick looks dark and dirty, it’s a sign that it’s time for a change.
  • Check engine light: Sometimes, the check engine light will illuminate when oil levels are low or when the oil is due for a change.
  • Burning smell: If you notice a burning smell coming from the engine area, this could be a sign of leaking oil or old oil that’s not functioning properly.
Oil Infographic

Choosing the Right Oil for Your Vehicle

Not all engine oils are created equal. From synthetic oils to high-mileage oils, selecting the right one ensures optimal performance. Learn more in our guide: What Makes a Reliable Car Care Partner

Myths About Oil Changes You Should Stop Believing

1: You Must Change Oil Every 3,000 km

This myth dates back to older engine technology. Modern engines and synthetic oils can go much further between changes. Follow your manufacturer’s guidelines for the right oil change intervals.

2: Dark Oil Means It’s Bad

Oil naturally darkens as it does its job. What’s more important is its texture and smell. Thick, gritty oil or oil that smells burnt is a sign it’s time for a regular oil change.

3: You Can Use Any Type of Oil

Using the wrong oil type can void warranties or damage your engine. Learn how to choose perfect gadgets and accessories including oil filters and more.

The Cost of Ignoring Oil Changes

Neglecting regular oil changes might seem like a small oversight, but over time, it can lead to serious consequences that affect both your car’s performance and your wallet.

  • 1. Complete Engine Failure:
  • Engine oil is responsible for lubricating all the moving parts inside your engine. When oil becomes old, dirty, or breaks down, it loses its ability to protect these parts. Friction increases, heat builds up, and over time, critical engine components begin to wear out or seize. In extreme cases, this can lead to total engine failure—leaving you stranded and facing a costly engine replacement that could have easily been avoided with regular oil changes.
  • 2. Poor Fuel Economy:
  • Dirty or degraded oil makes your engine work harder because it doesn’t lubricate as effectively. This extra effort means more fuel consumption, which directly impacts your fuel efficiency. Over time, you’ll find yourself making more trips to the gas station and spending significantly more on fuel than necessary.
  • 3. Costly Repairs and Part Replacements:
  • Skipping oil changes leads to sludge buildup, clogged oil passages, and accelerated wear of internal components like pistons, bearings, and camshafts. These repairs are expensive and often time-consuming. Regular oil changes are a simple, affordable way to prevent such high-cost mechanical issues.

Explore how car tuning for beginners can also help you understand your vehicle’s needs better.

The Future of Car Maintenance

Technology is revolutionizing the way we care for vehicles. In the near future, regular oil changes might be managed by:

  • AI-powered diagnostics: Your car will notify you with precision when oil changes are needed. Learn more in The Future of Cars: How the Automotive World is Evolving.
  • Smart oils: Newer formulations that adapt to driving conditions.
  • Automated oil change stations: Drive through and get your oil changed without leaving your car.

Staying informed about these innovations ensures your vehicle stays ahead of the curve in care and performance.

Get Expert Oil Change Services Today

Looking for a reliable auto service? Autoustaz offers trusted, affordable regular oil change services in your area. Whether you want in-garage service or doorstep convenience, our team has you covered.

Visit our website to schedule your next regular oil change. Enjoy peace of mind knowing your engine is in safe hands.

Doorstep oil change service by Autousataz

Frequently Asked Questions (FAQ)

Q1: How often should I change my car’s oil?
A: Most cars require an oil change every 3,000 to 5,000 miles, though newer models may go up to 7,500 miles with synthetic oil. Always check your owner’s manual for the manufacturer’s recommendations.

Q2: Can I change my oil myself?
A: While changing your oil is a DIY task many car owners can perform, it’s important to have the necessary tools, knowledge, and disposal methods for used oil. If you’re not sure, it’s best to leave it to professionals.

Q3: What type of oil is best for hot climates?

Synthetic oils like 5W-30 or 10W-40 are ideal for high temperatures because they maintain their viscosity and protective properties even under extreme heat. These oils ensure consistent lubrication, reduce engine wear, and help prevent overheating, making them an excellent choice for vehicles operating in hot or harsh driving conditions.

Q4: Where can I find a trusted service for oil change near me?

Use Autoustaz to find quick, reliable oil change services in your area with just a few clicks. Whether you’re at home or on the road, our trusted professionals provide convenient, high-quality oil change solutions tailored to your schedule—ensuring your car gets the care it needs, when it needs it.

Protect Your Engine—Book Your Oil Change Today!

A regular oil change isn’t just a maintenance task—it’s an investment in your car’s long-term health. Don’t wait for engine trouble to strike.
👉 Visit our shop to book your service now or browse our website for more car care solutions.

Summary

In conclusion, regular oil changes are one of the most cost-effective ways to ensure the longevity of your vehicle’s engine. Whether you choose to perform the oil change yourself or have a professional do it, make sure you’re sticking to a routine maintenance schedule. Your car will thank you with smoother performance, fewer repairs, and a longer lifespan. If you’re in need of an oil change, contact us today and schedule an appointment at Autoustaz!

DIY car owner changing brake pads and rotors in a home garage

6 Steps To Change Brake Pads and Rotors Like a Pro and Save Repair Cost

Table of Contents

  1. Tools & Materials You’ll Need
  2. Safety First: Prep Before You Start
  3. Step-by-Step Guide to Change Brake Pads and Rotors
    • Remove the Wheel
    • Remove the Caliper
    • Replace the Brake Pads
    • Replace the Rotor
    • Reinstall the Caliper
    • Reassemble & Test
  4. Brake Pad and Rotor Maintenance Tips
  5. Common Mistakes to Avoid
  6. When to Replace Brake Pads and Rotors
  7. Final Thoughts
  8. FAQ

When it comes to keeping your car safe, few things are as crucial as your braking system. Knowing how to change brake pads and rotors can save you hundreds in labor costs while giving you the satisfaction of maintaining your own vehicle. Whether you’re a weekend warrior, a budget-conscious driver, or someone just tired of overpaying at the shop, learning how to do this yourself is a solid step toward automotive independence.

In this step-by-step guide, we’ll walk you through the process in a way that’s easy to follow—even if you’re not a pro mechanic. We’ll talk tools, safety tips, and how to change brake pads and rotors at home without hassle. Let’s get your ride stopping smoothly again.

Few things are as crucial as your braking system. Here’s how your brake system works if you’re curious about the mechanics behind it. Knowing how to change brake pads and rotors not only extends the life of your vehicle but also deepens your understanding of car maintenance.

Bonus: Doing your car brake replacement is rewarding and surprisingly doable with a few basic tools.

Tools & Materials You’ll Need

Before we get into the nitty-gritty, here’s what you’ll want on hand:

  • Jack and Jack stands
  • Lug wrench or breaker bar
  • Socket set and ratchet
  • C-clamp or brake caliper tool
  • Brake cleaner spray
  • New brake pads
  • New rotors (optional but often recommended)
  • Anti-squeal brake grease
  • Torque wrench
  • Gloves and safety glasses

Tip: Double-check your vehicle’s manual for specific sizes and torque specs.

You can find quality pads and rotors at Advance Auto Parts, which often has deals for DIYers.

Safety First: Prep Before You Start

Before you change brake pads and rotors, it’s critical to prepare both your tools and your workspace. Park your car on a flat, level surface, engage the parking brake, and chock the rear wheels to prevent any unexpected rolling. Always work on a cool braking system—hot rotors can cause burns, and heated components may warp during disassembly. Grab your safety goggles and gloves, and make sure you’re using a jack and jack stands rated for your vehicle’s weight—never rely solely on a hydraulic jack.

Proper preparation not only makes your brake job smoother but also prevents mistakes that could cost you more in the long run. Double-check that you have all the necessary tools and parts before starting: a socket set, C-clamp or brake caliper tool, brake cleaner, and of course, the correct brake pads and rotors for your make and model.

Taking a few extra minutes to prep can turn your DIY brake maintenance from stressful to successful, and ensure you stay safe while working on one of the most important safety systems in your car. Also, wear protective gloves and goggles. Brake dust isn’t something you want in your lungs or eyes.

Step-by-Step Guide to Change Brake Pads and Rotors


Changing your own brakes might sound intimidating, but once you understand the process, it’s a very doable project—even for those with just basic tools. This DIY guide will walk you through each step needed to change brake pads and rotors safely and effectively, whether you’re tackling front brakes, rear brakes, or both.

By handling brake pad replacement and rotor replacement yourself, you’ll not only save a lot of money but also gain valuable knowledge about your vehicle’s braking system. Plus, doing it yourself means you get to inspect your car’s condition up close, something shops might skip.

1. Remove the Wheel

  • Loosen the lug nuts slightly before jacking up the vehicle.
  • Lift the car and secure it with jack stands.
  • Remove the lug nuts completely and take off the wheel.

2. Remove the Caliper

  • Locate the brake caliper—it’s the part hugging the rotor.
  • Use a socket or wrench to remove the bolts holding the caliper in place.
  • Gently slide the caliper off and support it with a hanger or rope. Don’t let it dangle by the brake hose!

If you’re new to this, NAPA Auto Parts has a solid visual guide on brake pad replacement that you might find helpful.

3. Replace the Brake Pads

  • Slide the old brake pads out of their bracket.
  • Inspect for uneven wear or damage.
  • Use a C-clamp or caliper tool to compress the piston back into the caliper housing—this makes space for the new, thicker pads.
  • Apply anti-squeal grease to the back of the new pads.
  • Install the new pads in the same orientation as the old ones.

4. Replace the Rotor

  • If your rotor is worn, warped, or grooved, now’s the time to swap it.
  • Remove any screws or retaining clips, and slide the old rotor off.
  • Clean the hub with a wire brush.
  • Slide the new rotor into place and secure it.

5. Reinstall the Caliper

  • Carefully position the caliper back over the new pads and rotor.
  • Reinstall and tighten the bolts to the manufacturer’s torque specifications.

6. Reassemble & Test

  • Reinstall the wheel and tighten the lug nuts.
  • Lower the car and torque the lug nuts in a star pattern.
  • Start the car and press the brake pedal several times until it feels firm.
  • Test drive at low speeds in a safe area to ensure everything’s working smoothly.

Now that you’ve gone through each stage of the brake job, from removing the wheel to torqueing the lug nuts back in place, you should feel much more confident in handling your own car brake maintenance. Taking the time to properly change brake pads and rotors doesn’t just save on repair bills—it gives you peace of mind knowing the job was done right.

Be sure to always test your brakes before hitting the road, and keep an eye (and ear) out for any unusual sounds in the days after the replacement. With each brake job, your skill and comfort level will keep growing.

Brake Pad and Rotor Maintenance Tips

  • Check your pads every 10,000–15,000 miles.
  • Replace rotors every 30,000–70,000 miles depending on wear.
  • Avoid hard braking to extend pad life.
  • Clean rotors with brake cleaner before installation to remove oils.

Common Mistakes to Avoid

  • Forgetting to torque lug nuts properly
  • Not compressing the caliper piston fully
  • Touching the rotor surface with greasy hands
  • Mixing up inner and outer pads
  • Skipping the brake grease—leads to squeaking

Skipping steps or using the wrong torque settings can mess things up—check this list of common DIY brake mistakes to stay on track

When to Replace Brake Pads and Rotors

Watch for these signs:

  • Squealing or grinding noises
  • Vibration when braking
  • Brake pedal feels soft or spongy
  • Vehicle pulls to one side when braking
  • Dashboard brake warning light comes on

Knowing when to change brake pads and rotors is crucial for staying safe on the road and avoiding damage to other parts of your braking system. Delaying a brake pad replacement can lead to metal-on-metal contact, which quickly wears out your rotors and increases repair costs.

If you’re hearing grinding, feeling vibrations when braking, or noticing it takes longer to stop, it’s probably time to take a closer look and consider whether it’s time to change brake pads and rotors.

It’s also smart to inspect your brakes regularly—especially if you’ve recently driven in extreme weather, hilly terrain, or heavy stop-and-go traffic. These conditions wear down pads and rotors faster than normal. By doing your own visual checks and listening to how your brakes feel and sound, you’ll be able to spot issues early and decide when it’s the right time to change brake pads and rotors.

Handling your own brake maintenance might seem intimidating at first, but with the right tools and guidance, it becomes a straightforward process. Many DIY car owners prefer to tackle this job themselves to save money and gain a better understanding of their vehicle. When you know how and when to change brake pads and rotors, you take control of your car’s performance, safety, and long-term health.

Learning how to change brake pads and rotors properly ensures that your braking system functions efficiently. If you’re confident with basic mechanical tasks, this is one of the most cost-effective ways to keep your vehicle in top shape. Always refer to your vehicle’s manual and follow proper safety procedures before beginning any work.

Don’t wait until it’s unsafe—changing car brakes before failure is key to road safety. By knowing when and how to change brake pads and rotors, you protect yourself, your passengers, and your investment in your vehicle.

Final Thoughts

Learning how to change brake pads and rotors yourself is one of the most rewarding and cost-saving skills a car owner can pick up. Not only does it help you avoid high repair shop fees, but it also gives you more control over the safety and performance of your vehicle.

Doing it yourself means you can use quality parts, follow proper steps, and double-check everything, giving you peace of mind that your car’s braking system is in great shape.

Whether you’re a weekend warrior or just someone trying to save money on car repairs, taking the time to understand the brake pad replacement and rotor replacement process is totally worth it. The more hands-on experience you get, the easier it becomes to change brake pads and rotors without relying on a mechanic.

If you’re ready to change brake pads and rotors at home, you’ll benefit from greater knowledge, confidence, and savings. Just remember: when in doubt, consult your vehicle’s manual, and never cut corners when it comes to your brakes. With the right tools, some patience, and a clear step-by-step guide (like this one), you’ll be ready to change brake pads and rotors safely and efficiently—anytime you need to.

FAQ’s “Frequently Asked Questions (FAQ)

Q1. How often should I change my brake pads and rotors?


You should change brake pads and rotors approximately every 30,000 to 70,000 miles, depending on your driving habits, vehicle type, and the quality of the brake components. Aggressive braking, city driving, and heavy vehicles can wear out pads and rotors faster. Always refer to your owner’s manual, and inspect your brakes during routine maintenance. If you notice squealing sounds, grinding, or reduced braking performance, it’s a good sign it’s time to change brake pads and rotors.

Q2. Can I replace brake pads without replacing rotors?


Yes, it’s possible to replace just the brake pads, but it’s not always the best idea. If your rotors are warped, deeply grooved, or below minimum thickness, you should change brake pads and rotors together. Replacing only the pads on damaged rotors can lead to uneven wear, reduced braking efficiency, and noise. For optimal safety and smoother braking, it’s often smarter—and safer—to do a full brake pad and rotor replacement.

Q3. Is it cheaper to change brake pads and rotors yourself?


Definitely. Doing your own brake job can save you anywhere from $200 to $500 or more, depending on the vehicle and labor rates in your area. When you change brake pads and rotors yourself, you’re only paying for the parts and maybe a few tools—no labor costs. Plus, it gives you greater control over the quality of parts used and ensures the job is done thoroughly. If you’re comfortable with basic tools and have a bit of mechanical knowledge, the savings are well worth it.

Q4. How do I know if my rotors need replacing?


Some telltale signs that it’s time to change brake pads and rotors include visible grooves, scoring, or cracks on the rotor surface. You may also notice vibrations or a pulsing sensation through the brake pedal when stopping. This usually means the rotors are warped. A visual inspection along with performance symptoms, will help you decide whether it’s time to replace just the pads or go ahead and change both brake pads and rotors.


Q5. Do I need to bleed the brakes after replacing pads and rotors?


In most cases, no—you don’t need to bleed the brakes when you change brake pads and rotors, unless you’ve opened the brake fluid line or notice a soft or spongy brake pedal. If you had to remove the caliper completely or if air entered the system, bleeding becomes necessary to restore a firm pedal feel and ensure safe braking. It’s a good practice to check brake fluid levels after a DIY job, even if bleeding isn’t required.

Want more hands-on car maintenance guides like this? Subscribe to autoustaz.com for expert DIY tips, maintenance checklists, and budget-saving hacks delivered right to your inbox. Keep your car in top shape—and your wallet intact.

How to Perform a Basic Oil Change at Home

How to Perform a Basic Oil Change at Home

How to Perform a Basic Oil Change at Home

Learn how to perform a basic oil change at home with this detailed, step-by-step guide. Save money and maintain your car efficiently!

Why Change Your Oil at Home?

Performing a DIY oil change at home is not only cost-effective, but it also empowers you to keep your car in top shape. Regular oil changes help maintain your engine’s health, prevent wear and tear, and ensure smooth performance. In this step-by-step guide, we’ll walk you through everything you need to know about changing your oil at home—whether you’re a beginner or just looking to save money on maintenance.

What You’ll Need for a DIY Oil Change

Change Your Oil at Home

Before diving into the oil change process, gather these essential tools and supplies:

  • Motor Oil: Choose the right oil for your car’s make and model. For example, synthetic oil is often the best option for high-performance engines, while conventional oil may be adequate for older cars. Check your owner’s manual for the exact specifications.
  • Oil Filter: Always replace your oil filter when performing an oil change. The best oil filter for your car depends on the make and model—brands like Fram and Mobil 1 are highly recommended.
  • Tools:
  1. Wrench or socket set
  2. Oil filter wrench
  3. Drain pan (to collect old oil)
  4. Funnel for pouring new oil
  5. Car jack and jack stands (if needed)
  6. Gloves and safety glasses
  7. Rags for cleaning up spills
  • New Oil Drain Plug Washer (optional, but recommended)

Step-by-Step Guide to Changing Your Oil

Step-by-Step Guide to Changing Your Oil

1. Prepare the Car and Gather Your Materials

  • Make sure your car is on a level surface.
  • Gather all the necessary tools, including your oil filter and motor oil.

2. Lift the Car (If Needed)

  • If you need access to the oil pan underneath the car, lift your car using a car jack and secure it with jack stands. Always ensure the car is stable before proceeding.

3. Drain the Old Oil

  • Position the Drain Pan: Place the drain pan under the oil pan.
  • Remove the Drain Plug: Use your wrench to unscrew the oil drain plug. Let the oil drain fully, which can take 5-10 minutes. Make sure to dispose of the used oil properly at a local recycling center.

4. Remove and Replace the Oil Filter

  • Use an oil filter wrench to remove the old oil filter.
  • Lubricate the rubber gasket of the new filter with a bit of fresh oil before screwing it in place.
  • Tighten the new filter by hand—don’t over-tighten.

5. Refill with Fresh Oil

  • Locate the Oil Fill Cap: Unscrew the cap on the top of your engine.
  • Use a Funnel: Pour the fresh oil into the engine slowly. Be sure to add the correct amount as per your vehicle’s specifications.

6. Check for Leaks and Oil Level

  • Start the car for a few minutes to circulate the oil. Check around the drain plug and filter for any leaks.
  • Turn off the engine and use the dipstick to check the oil level. Add oil if necessary.

7. Dispose of Old Oil Properly

  • Never dispose of used oil down the drain or in the trash. Find a local auto shop or recycling center to dispose of your old oil and filter.

How Often Should You Change Your Car’s Oil?

The general recommendation for oil changes is every 3,000 to 7,500 miles, depending on the type of oil used and your car’s model. Always check your car’s owner manual for the manufacturer’s recommended oil change intervals.

Common Mistakes to Avoid During a DIY Oil Change

  • Not Tightening the Filter Properly: If the oil filter is not tightened enough, oil could leak out.
  • Overfilling Oil: Adding too much oil can cause engine damage. Always check the oil level before driving.
  • Not Replacing the Oil Filter: Failing to replace the filter can result in dirty oil circulating through your engine.

Tips for a Successful Oil Change

Tips for Oil Change
  • Use the Right Oil: Always choose the best oil for your specific car model. Consult your owner’s manual or visit an auto parts store for recommendations.
  • Clean the Area: Wipe away any spilled oil or dirt to prevent contamination of the engine and environment.
  • Use Safety Gear: Always wear gloves and safety glasses to protect yourself from hot oil and sharp parts.

Take Charge of Your Car Maintenance

Car Maintenance

Now that you know how to perform a basic oil change at home, you can keep your car running smoothly and save money on service bills. With a little practice, you’ll be able to perform oil changes with ease and confidence. For more DIY car maintenance tips, check out our guide on how to choose the perfect gadgets for your car maintenance.

What Makes a Reliable Car Care Partner?

Elaborate The Future of Cars: How the Automotive World is Evolving

Have you tried doing an oil change yourself? Share your experiences in the comments below! If you found this guide helpful, don’t forget to share it on social media with friends who might need a hand with their car maintenance!

The Future of Cars: How the Automotive World is Evolving

The automotive world is one of the most fast-paced and exciting industries out there. From the invention of the first car to the rise of electric vehicles (EVs) and self-driving cars, the journey has been nothing short of remarkable. In this post, we’ll take a look at how cars have evolved, what’s happening in the industry today, and what we can expect in the future.

A Brief Look at the History of Cars

The automobile’s story began in the late 1800s when Karl Benz built the first gasoline-powered car in 1885. However, it wasn’t until Henry Ford introduced assembly line production that cars became affordable for the average person. The Ford Model T, released in 1908, is often considered the car that made driving accessible to the masses.

As time went on, the automotive industry saw some truly iconic cars, like the Chevrolet Corvette and the Ford Mustang, which not only showcased technical innovations but also became symbols of culture, freedom, and personal expression.

Modern Cars: Focus on Efficiency, Safety, and Tech

Fast-forward to the 21st century, and the automotive world started to prioritize efficiency, safety, and technology. With growing environmental awareness, fuel-efficient cars became a priority. The Toyota Prius, introduced in 1997, led the charge in hybrid vehicles, paving the way for eco-conscious driving.

At the same time, safety features like airbags, anti-lock brakes, and electronic stability control became standard. These advancements helped to reduce accidents and improve the overall driving experience. The integration of advanced entertainment and navigation systems further transformed how we interact with our cars.

The Rise of Electric Vehicles (EVs)

One of the most significant shifts in recent automotive history is the surge of electric vehicles (EVs). In 2008, Tesla made waves by releasing its Roadster, proving that electric cars could be not only eco-friendly but also fast and stylish. Since then, EVs have moved from a niche market to mainstream options, with almost every major automaker, including Ford, General Motors, and Volkswagen, jumping on the electric bandwagon.

Government incentives and a growing awareness of climate change have accelerated the shift to EVs, and experts predict that electric cars will dominate the market in the coming decades. As battery technology continues to improve, EVs are expected to become more affordable and practical for everyday drivers.

The Era of Autonomous Vehicles

While electric vehicles are a major trend right now, the future might be all about autonomous, or self-driving, cars. Companies like Waymo (a subsidiary of Google’s parent company, Alphabet) and Tesla are leading the way in developing vehicles that can drive themselves. Although we’re not quite there yet, autonomous technology is advancing quickly, and many believe it will revolutionize transportation.

Self-driving cars have the potential to drastically reduce traffic accidents, ease congestion, and provide mobility for those unable to drive. However, there are still challenges to overcome, including regulatory issues, safety concerns, and public skepticism. It’s also important to think about how this technology might affect jobs that involve driving, like delivery drivers and taxi services.